Phishing can escalate within minutes—so you need a clear, repeatable flow. This checklist helps you stabilize a Microsoft 365/Entra ID account quickly, limit the impact, and prevent further compromise.
What happened?
For the first triage, you need two key facts:
- Did the user only click the link?
- Did the user also enter a password?
Scenario A – Link clicked only
Usually lower risk (no password entered). Focus: endpoint checks (downloads, malware, browser/session).
Scenario B – Password entered
Treat the account as compromised. Run the full checklist.
Step-by-step fix
Change the password immediately
- Hybrid user (on-prem AD → synced to Entra): Set a strong new password in on-prem AD and provide it to the user by phone.
- Cloud-only account: Set a strong new password in Entra ID (Azure AD) and provide it to the user by phone.
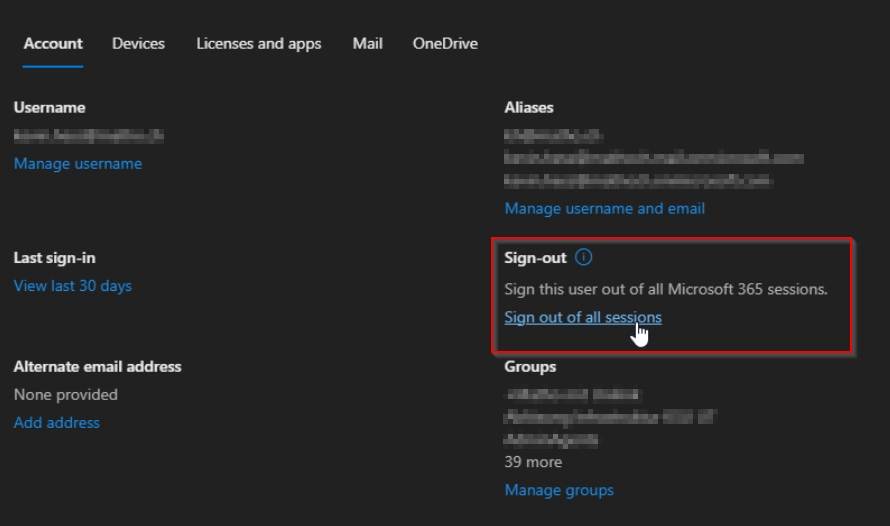
Sign out all active sessions
- Microsoft 365 admin center: select user → “Sign out from all sessions”
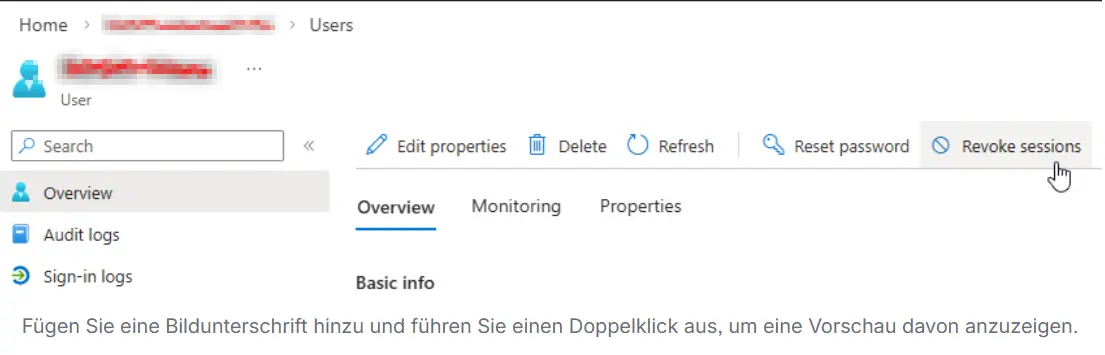
- Additionally in Entra ID: select user → Revoke sessions
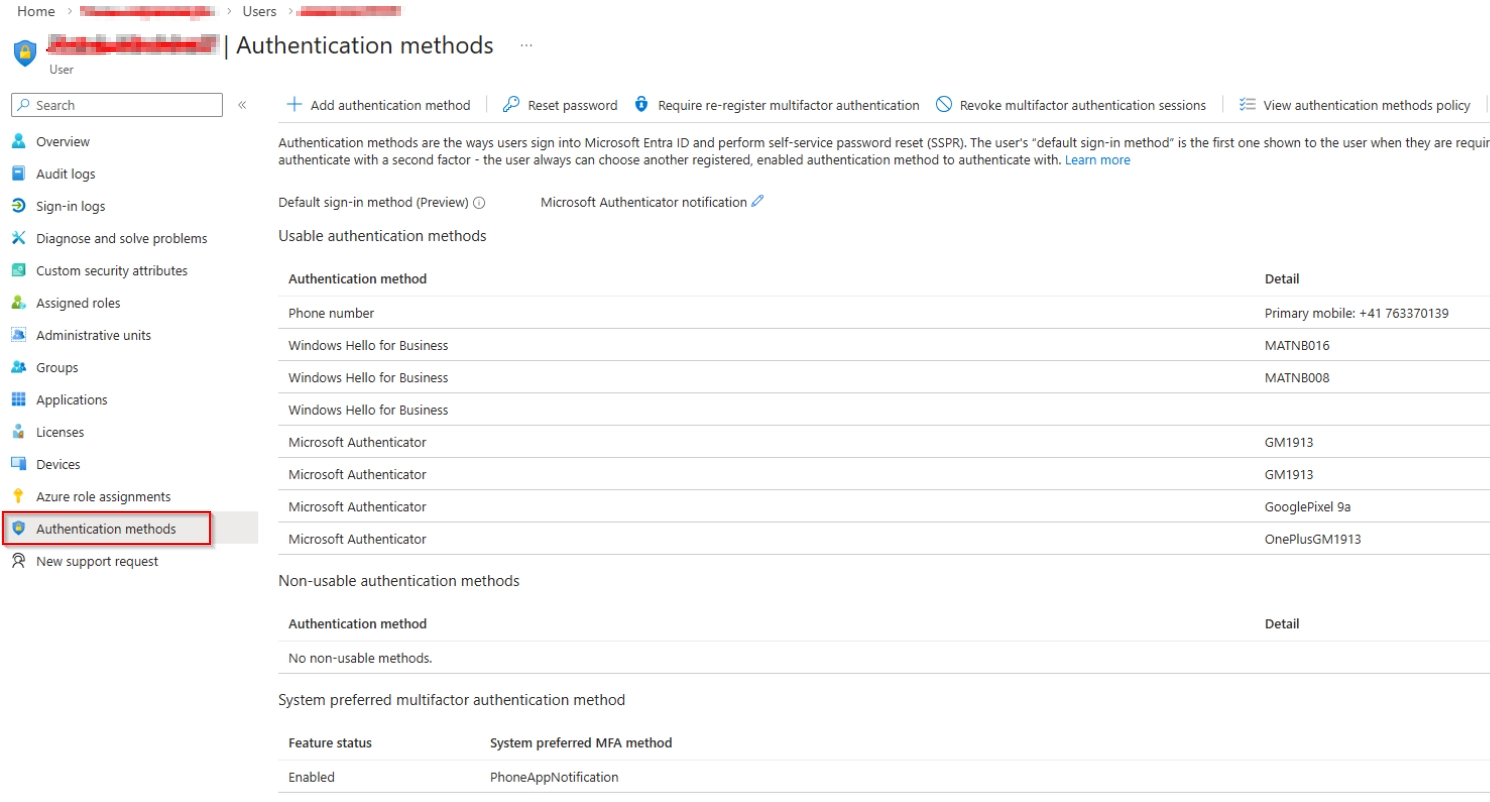
- Review MFA (multi-factor authentication)
In Entra ID → User → Authentication methods, check:
- New authenticator devices added?
- New phone numbers added?
- Additional methods added?
➜ Remove unknown methods immediately
➜ Re-register MFA if needed
Check mailbox rules and forwarding In Exchange Online, review:
- Inbox rules (especially forwarding & delete rules)
- Forwarding / automatic replies
- Transport rules (if an admin account is involved)
➜ Remove any unknown forwarding straight away
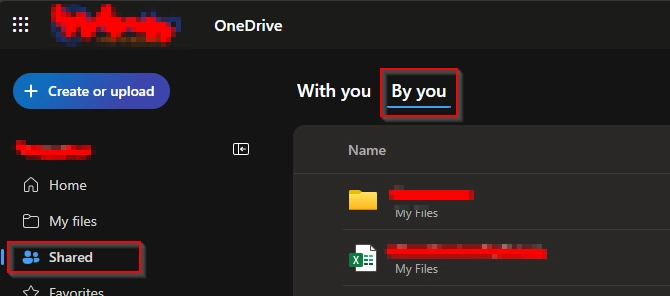
(Optional, recommended) Check OneDrive/Teams/SharePoint Look for unusual exfiltration patterns:
- Recently created shares
- Unusual external sharing
- New anonymous links
Example flow (OneDrive): - Open the user’s OneDrive in the browser → Shared
- Shared by you
- Sort by Recently shared
Check endpoints
- Run a malware scan (EDR/Defender/AV)
- Clear session cookies, fully close browsers
- Clear cookies/cache
- Treat saved browser passwords as compromised:
- review stored passwords
- change sensitive ones (e.g., banking)
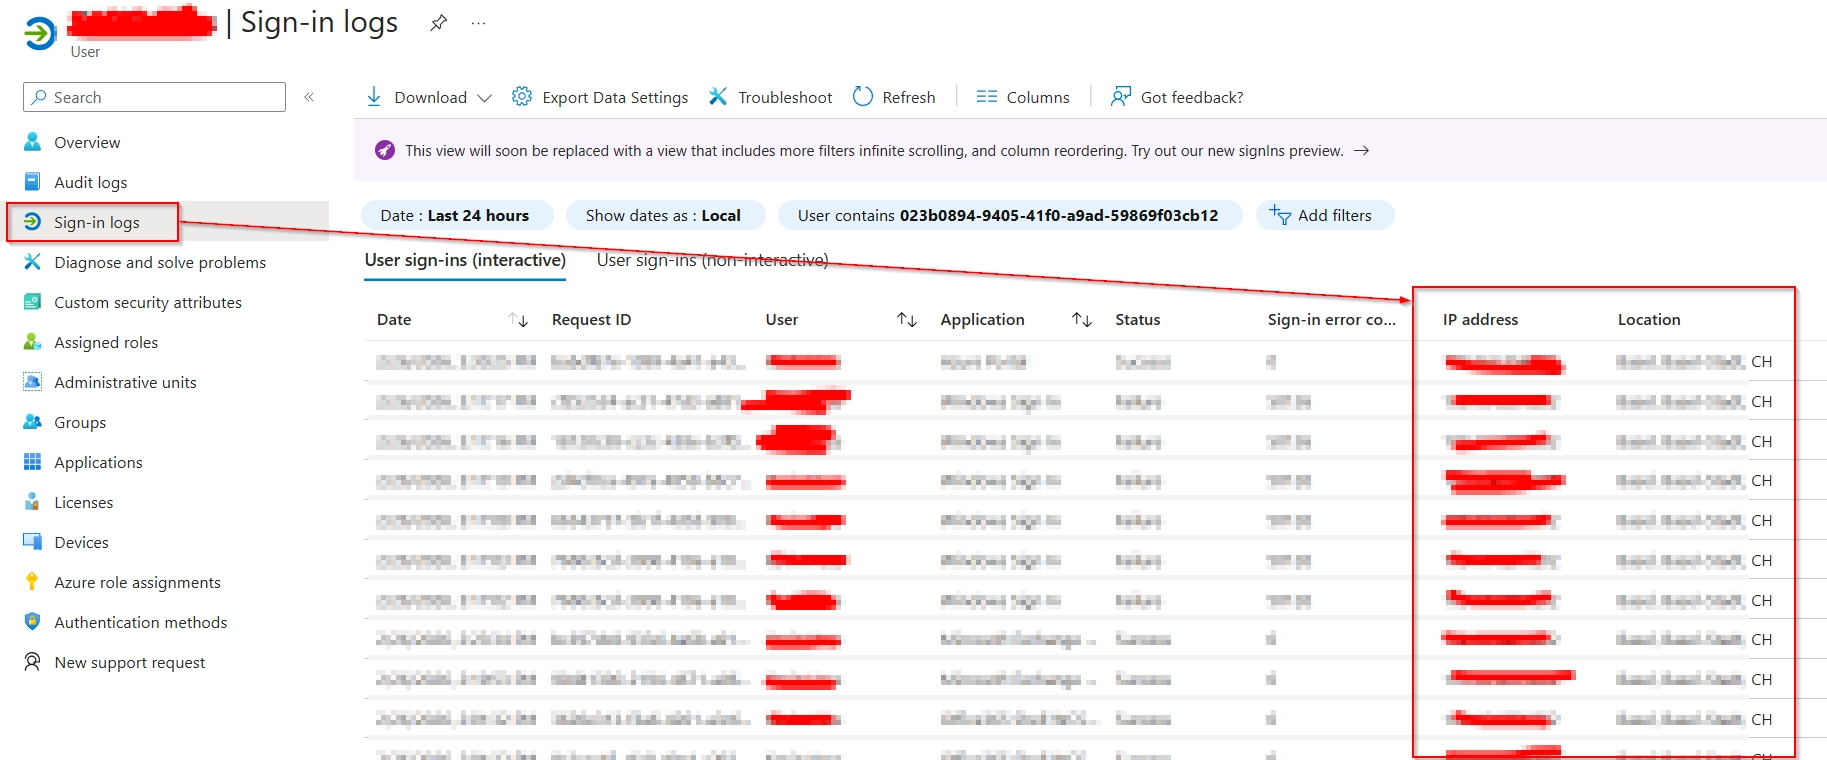
Review audit logs (sign-ins) In Entra ID → User → Sign-in logs, look for:
- Unusual locations
- “Impossible travel” patterns / risky sign-ins
- Suspicious user-agent or device changes
Review Azure/Entra roles & privileged activity
- Any new role assignments?
- Any new users created?
- Are privileged roles affected (Global Admin, App Admin, Exchange Admin)?
Check for additional impacted accounts
- Was the phishing email forwarded internally?
- Run Message Trace
- If possible: tenant-wide message removal
- Inform users (short guidance: password/MFA/device)
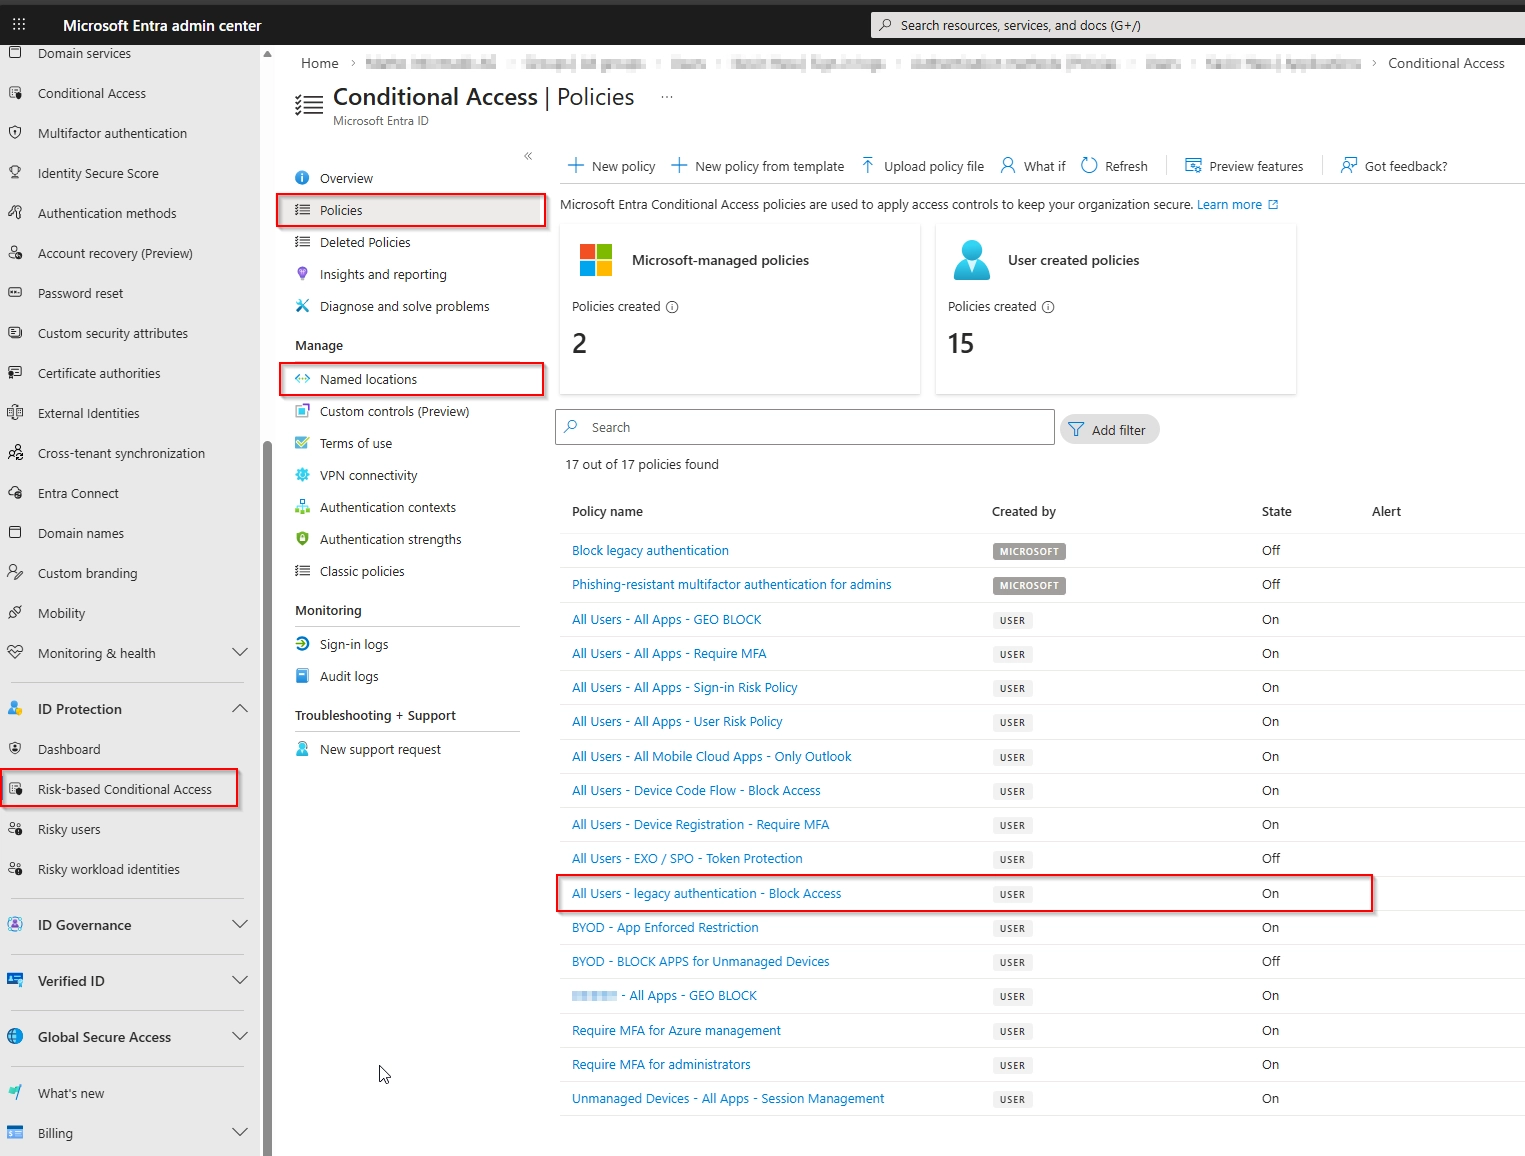
Review Conditional Access / Security Defaults
- If Security Defaults are enabled, there’s no classic Conditional Access.
- Otherwise review:
- Policy changes or newly created policies
- New Named Locations Tip: sort by Created/Modified to spot changes fast.
- Review registered apps / enterprise apps (OAuth consent) In Entra ID → User → Applications (and Enterprise Applications):
- Any newly added apps with permissions?
- New OAuth consent entries (User/Admin Consent)?
- Remove unknown applications and validate admin consent

- Optional – depending on severity
- Reset passwords for all admin accounts
- Global sign-out for the entire organization
- Notify the data protection officer (if data exfiltration is possible)
FAQ / Troubleshooting
Do I need the full checklist if the user “only” clicked the link?
Recommended yes—at least endpoint check + session revoke + MFA review, because drive-by downloads and session theft can happen.
Why share the new password by phone?
Because email/chat channels may be compromised or monitored during an incident.
Is changing the password enough?
Often not. If an attacker already has a token/session, access may continue unless you sign out/revoke sessions.
What mailbox rules are most suspicious?
Rules that forward, delete, mark as read, or filter by sender/subject—classic attacker tactics to hide traces.
How do I spot OAuth phishing?
If an app suddenly has broad permissions (mail, files, Teams) without a clear business reason: revoke consent, remove the app, and review logs.
Pro tip
Store this checklist as an internal runbook and add your exact toolchain (EDR, ticketing, SIEM). In a real incident, clear click paths save minutes.
Summary
- First: password reset + sign-out/revoke sessions + MFA cleanup.
- Then: check mailbox rules, sharing, logs, roles, and apps.
- If exfiltration is suspected: escalate org-wide (admin resets, global sign-out, data protection).